Using Cameras on a Virtual Machine
Preparing for Use
Before you use your camera, we recommend that you are aware of the following resources available from the Downloads page:
Getting Started Manual for the camera—provides information on installing components and software needed to run the camera.
Technical Reference for the camera—provides information on the camera’s specifications, features and operations, as well as imaging and acquisition controls.
Firmware updates—ensure you are using the most up-to-date firmware for the camera to take advantage of improvements and fixes.
Tech Insights—Subscribe to our monthly email updates containing information on new knowledge base articles, new firmware and software releases, and Product Change Notices (PCN).
System Configuration
We tested and recommends this system configuration.
| Component | Description |
| MacBook Pro 15” | Model MacBook Pro11,3 |
| CPU | Intel Core i7 2.6 GHz |
| RAM | 8 GB of 1600 MHz DDR3 SDRAM |
| Operating System | OSX 10.10.2 Yosemite |
| Software |
FlyCapture 2.7.3.18 NI-MAX 14.5 |
| Camera |
Blackfly BFLY-U3-23S6C firmware 1.8.3.0 Flea3 FL3-GE-13S2C firmware 1.8.3.0 Grasshopper3 GS3-U3-23S6C firmware 2.15.3.0 |
We tested these virtual machine software programs on these operating systems.
| Virtual Machine O/S | VMware on Windows 7 | Parallels on OS X |
| Windows 8.1 | Enumeration and Acquisition OK | Enumeration and Acquisition OK |
| Windows 8.1 | Enumeration and Acquisition OK | Enumeration and Acquisition OK |
 |
We do not test cameras on Virtual Machines and therefore may be unable to answer questions regarding possible errors that may occur with their use. |
Setup for Using Parallels in OS X
To enumerate a camera on OS X Parallels and stream images:
- Install Parallel Desktop 10 for Mac.
- Follow the instructions on the Parallels website to install Windows 8.1 guest.
- For USB 3.1 cameras, click on the settings icon in (1) below and check USB 3.1 support: Enable (2).
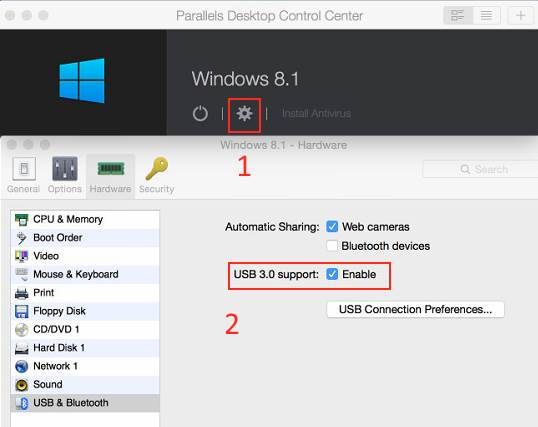
- For USB 3.1 cameras, click on the settings icon in (1) below and check USB 3.1 support: Enable (2).
- Power up Windows 8.1 guest and install FlyCapture2.
- Connect your camera to the host PC.
- Ensure the camera can acquire images.
- To select your camera in the virtual machine:
a. For GigE, in the Windows 8 toolbar, go to Devices. Under Network, select the Ethernet port that your camera is connected to.
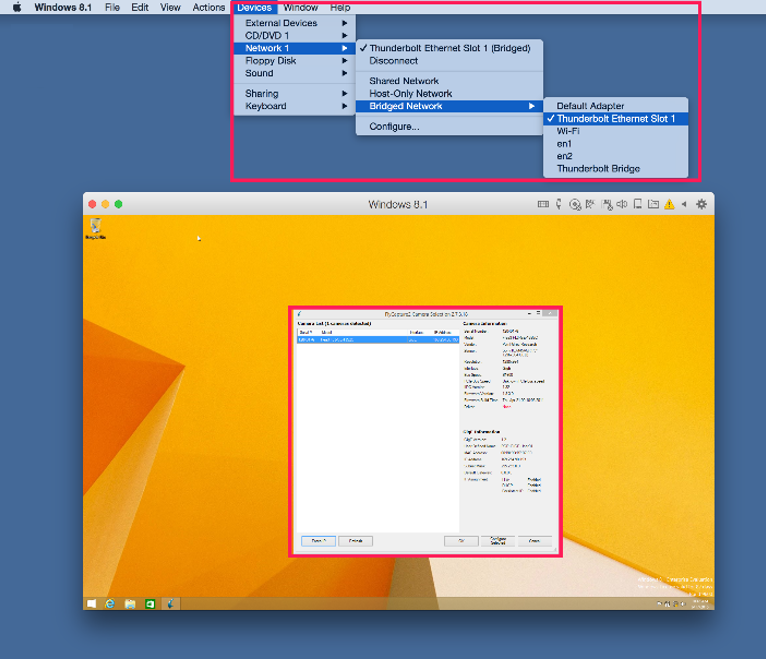
b. For USB 3.1, toggle the camera between the Parallel and host PC using the device icon shown below.
7. Stream the camera.

Setup for Using VMware in Windows 7
To enumerate a camera on Windows 7 and VMWare and stream images:
- Install VMWare Workstation 11.
- Follow the steps in VMware documentation to install Windows 8.1 guest.
- Launch the VMware workstation and select Windows 8.1.
- Click Edit virtual machine settings and select Network Adapter.
a. For GigE, select Bridged… Network connection and click OK.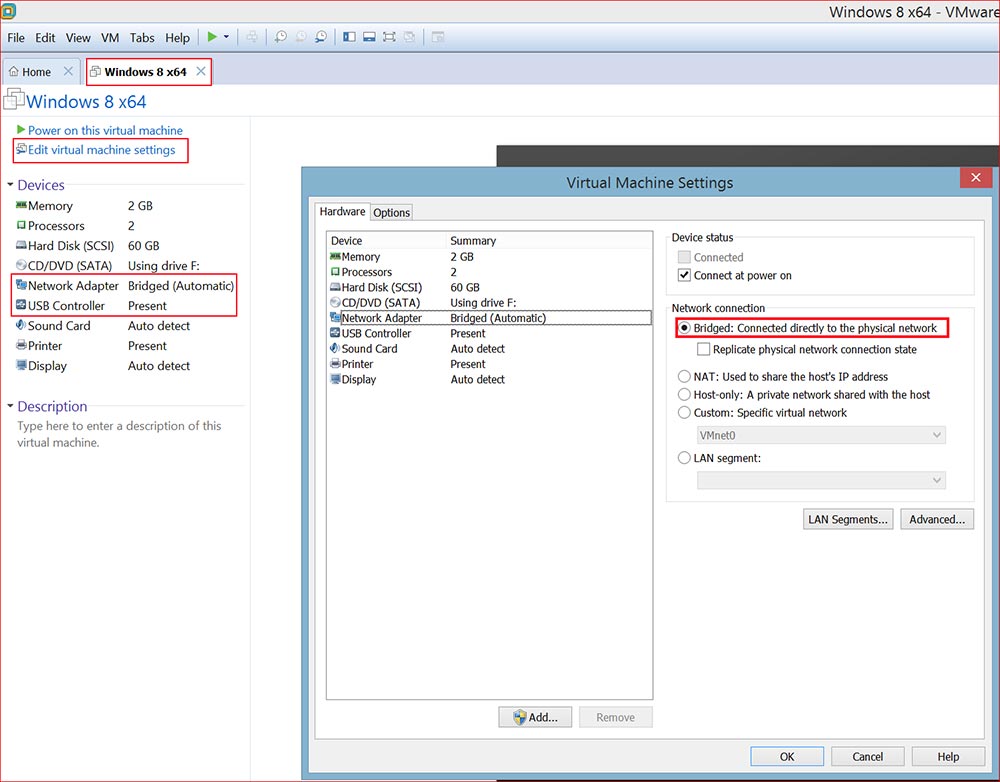
5. Connect the camera to the host PC.
6. Ensure the camera can stream in the host PC.
7. Install NI-MAX in VMware (Windows 8.1). For instructions on installation, see Getting Started with NI-MAX and LabVIEW.
8. Launch NI-MAX in WMware (Windows 8.1) and stream the camera.