Getting Started with OpenCV
Preparing for Use
Before you use your camera, we recommend that you are aware of the following resources available from our Downloads page:
Getting Started Manual for the camera—provides information on installing components and software needed to run the camera.
Technical Reference for the camera—provides information on the camera’s specifications, features and operations, as well as imaging and acquisition controls.
Firmware updates—ensure you are using the most up-to-date firmware for the camera to take advantage of improvements and fixes.
Install OpenCV
This document describes the steps for OpenCV version 4.1.0, but it also applies to newer versions. For best results, download the latest version.
- Download the latest version of OpenCV from https://opencv.org.
- Extract OpenCV in C:\
- From the Start Menu, right-click on Computer and select Properties.
- In the System window left pane, click Advanced system settings.
- In the System Properties dialog, from the Advanced tab, click Environment Variables.
- From the System variables list, select the Variable called Path and click Edit.
- At the end of the Variable value field, enter
;C:\opencv\build\x64\vc15\bin
For 32-bit OpenCV version, replace x64 with x86. - Click OK.
Configure OpenCV in Visual Studio
Add OpenCV to Visual Studio projects to perform image processing. The steps below outline how to prepare the Visual Studio settings in order to use OpenCV with Spinnaker, FlyCapture, LadybugCapPro, or Triclops SDKs. The example used is for the Spinnaker SDK.
- Download and install the SDK, in this example Spinnaker, available from download page.
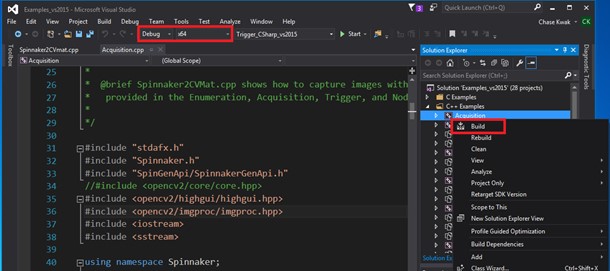
- Open Spinnaker2CVMat.cpp from “Sample Code for OpenCV”. Copy and paste this code into one of the example source code solutions in Visual Studio. This document uses Acquisition.cpp with Visual Studio 2015 as an example.
- Ensure Debug is selected in the Solution Explorer’s configuration.
- Right-click on the project and select Build.
- Right-click on Acquisition and select Properties.
- In the Property Pages window, select VC++ Directories and from the Include Directories drop-down select Edit.
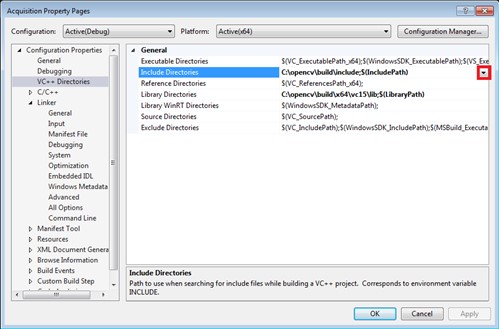
- Add C:\opencv\build\include and C:\Program Files\Point Grey Research\spinnaker\include and click OK.

- From the Property Pages window, from the Library Directories drop-down select Edit.
- Add C:\opencv\build\x64\vc15\lib and click OK.
Note: For 32-bit systems, replace x64 with x86.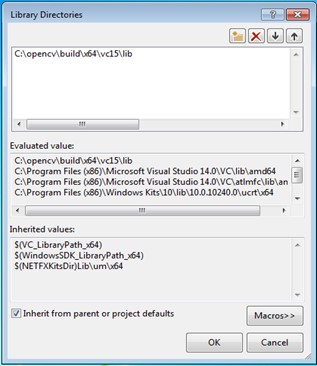
- From the Property Pages window, select Linker→Input, and from the Additional Dependencies drop-down select Edit.
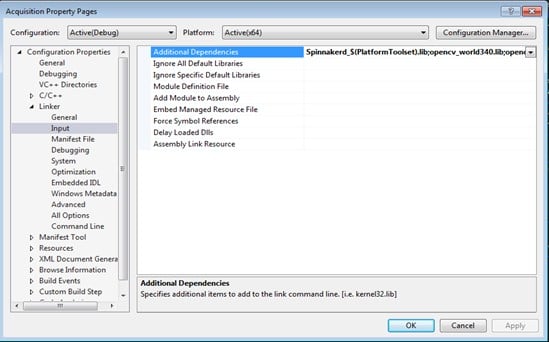
- Add the following library files and click OK.
opencv_world340.lib
opencv_world340d.lib
Note: If you are using a different OpenCV version, replace library files according to the version you are using. You can find library files at C:\opencv\build\x64\vc15\lib. - Click OK to save all project settings.
- For FlyCapture: open FlyCapture2Test.cpp and add #include “cv.h.”
For Spinnaker: open Spinnaker2CVMat.cpp and add #include "opencv2/highgui/highgui.hpp" and "opencv2/imgproc/imgproc.hpp".
You can now add you own OpenCV code in FlyCapture2Test.cpp or Spinnaker2CVMat.cpp.
Sample Code for OpenCV
These examples demonstrate how to convert images from FlyCapture, FlyCapture2, and Triclops to OpenCV images.
FlyCapture
FlyCap_to_IplImage.cpp provides the function to convert from FlyCaptureImage to IplImage.
Applicable: All FLIR machine vision cameras except Gazelle and Cricket.
FlyCapture2
FlyCap2_to_IplImage.cpp provides the function to grab images from your camera and convert them to IplImage using FlyCapture2 SDK.
Applicable: All FLIR machine vision cameras except Gazelle and Cricket.
Triclops
Triclops_to_IplImage.cpp provides the function to convert from TriclopsImage to IplImage.
Applicable: All FLIR Stereo cameras.
Ladybug
FC2_Ladybug_Image_to_IplImage.cpp provides the function to convert uncompressed Ladybug images.
Applicable: Ladybug cameras
Spinnaker
Spinnaker2CVMat.cpp map the Spinnaker ImagePtr calss to OpenCV Mat container. The OpenCV version tested was 3.4.0 which has the same configuration file with dll extensions 340. Note that imageptr to getData() method returns padding which must be taken into account when dumping data into a Mat container so the container does not overflow.
AcquisitionOpenCV - This example is a modification of the Spinnaker SDK Acquisition Example, that demonstrates how to convert a Spinnaker Image to an OpenCV Mat object and display the result using OpenCV HighGUI; tested with OpenCV 4.1.0.
Applicable: All FLIR machine vision USB3 Vision and GigE Vision cameras